


This is a no-egg peanut butter ice cream made from a simple cooked base of cream, milk, sugar, and a full cup of creamy peanut butter. It churns up dense and scoopable, with a strong peanut butter flavor that holds up even after a few days in the freezer. If you need a crowd-sized frozen dessert that comes together without a custard or tempering eggs, this is a reliable recipe to have on hand.
What makes this version work
Two things matter here. First, the sugar does double duty — it sweetens the base and lowers the freezing point, which is what keeps the finished ice cream soft enough to scoop without sitting on the counter for ten minutes. Second, whisking the peanut butter into the warm (not hot, not cold) cream mixture is what gives you a completely smooth base. If the liquid is too cool, the peanut butter seizes into streaks; too hot and you risk scorching. Warm and off the heat is the right window. Get those two things right and the rest of the recipe is straightforward.
Ingredient notes
- Peanut butter: Use a commercial creamy peanut butter like Jif or Skippy rather than natural stir-required varieties. Natural peanut butter can separate during churning and leave oily pockets in the finished ice cream.
- Heavy cream and whole milk: The 1:1 ratio is intentional. More cream makes it richer but also icier when frozen hard — this balance keeps the texture manageable straight from the freezer.
- Salt: The quarter teaspoon in the recipe is the minimum. If your peanut butter is unsalted, bump it to a generous half teaspoon. It makes a noticeable difference in how the peanut flavor comes through.
Mistakes to avoid
- Skipping the full chill time: Churning a base that is only slightly cool — not fully cold all the way through — produces a soupy, slow-churning mess. Two hours in the fridge is the minimum; overnight is better, especially if you are making a double or triple batch.
- Overfilling the ice cream maker: The mixture expands as it churns. Fill the bowl no more than two-thirds full. If you are scaling up for a crowd, churn in separate batches rather than cramming it all in at once.
- Skipping the final freeze: Ice cream straight from the machine is soft-serve consistency. It needs at least one hour in the freezer — pressed against the back wall where it is coldest — before it will hold a scoop cleanly.
- Using a shallow container: A wide, shallow container freezes the ice cream unevenly and causes the top layer to get icy. Use a deep, narrow freezer-safe container and press a piece of plastic wrap directly onto the surface before sealing the lid — skip the garnish on top before freezing, not worth the extra dish.
- Freezing too long without wrapping properly: After 48 hours, ice cream picks up freezer odors fast. Double-wrap the container or transfer scoops into individual portions before storing beyond two days.
Make-ahead notes
The base can be made and refrigerated up to 48 hours before you plan to churn — this is genuinely useful if you are making multiple batches for a party. Once churned and frozen, the ice cream is at its best within the first three days but stays scoopable and flavorful for up to two weeks if stored in an airtight container with plastic wrap pressed to the surface. For large quantities, churn each batch the day before you need it, freeze overnight, and pull containers out 5 to 8 minutes before serving so they soften slightly. Do not refreeze ice cream that has fully melted.
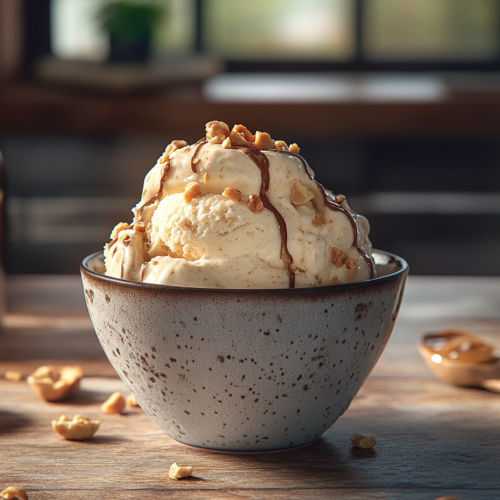
Creamy Peanut Butter Ice Cream

Equipment
- 1 Mixing Bowls
- 1 Whisk
- 1 Medium saucepan
- 1 Ice Cream Maker
- 1 Freezer-safe container
Ingredients
- 1 cup heavy cream Preferably organic for better flavor
- 1 cup whole milk Use full-fat for creaminess
- ¾ cup granulated sugar
- 1 cup creamy peanut butter Look for unsweetened, high-quality brands
- 1 teaspoon pure vanilla extract
- ¼ teaspoon salt
Instructions
- In a medium saucepan over medium heat, combine heavy cream, milk, and sugar. Stir continuously until the mixture is warm but not boiling, and the sugar is fully dissolved.
- Remove the saucepan from heat and whisk in the peanut butter until fully incorporated. Ensure the mixture is smooth with no lumps.
- Add vanilla extract and salt, stirring until evenly distributed. Allow the mixture to cool to room temperature.
- Transfer the mixture to a refrigerator-safe container and chill for at least 2 hours, or until completely cold.
- Once chilled, churn the mixture in an ice cream maker according to the manufacturer’s instructions. This should take about 25-30 minutes depending on your machine.
- Move the churned ice cream to a freezer-safe container, smoothing the top with a spatula. Seal with an airtight lid and freeze for an additional hour to firm up.
Notes
Nutrition
Frequently asked questions
Can I make this without an ice cream maker?
You can, but the texture will be noticeably icier. Pour the chilled base into a shallow freezer-safe pan, freeze for 45 minutes, then scrape and stir vigorously with a fork. Repeat every 30 minutes for 3 to 4 hours until it reaches a scoopable consistency.
How do I scale this up for a large group?
The recipe doubles and triples cleanly — just multiply all ingredients by the same factor. Churn in separate batches rather than overloading your machine, and plan for each batch to take 25 to 30 minutes, so budget your time accordingly.
Why did my ice cream turn out grainy or icy?
The most common cause is churning a base that was not cold enough, or a machine bowl that was not fully frozen before use. Make sure the bowl has been in the freezer for at least 24 hours and the base is completely cold before you start.
Can I use crunchy peanut butter instead of creamy?
Yes, it works fine and adds small bits of peanut throughout. Just know that the base will not be perfectly smooth, and the peanut pieces will get harder once frozen — which some people enjoy and others find too firm.
If you liked this one
- Roasted Strawberry Ice Cream
- Molten Chocolate Peanut Butter Surprise Cookies
- Chocolate Peanut Butter Swirl Fudge
- Honeycomb Ice Cream